How to setup ESLint and Prettier with VS Code and VueJS
July 20, 2020 (9 min read)
Most people understand the concepts of code linting and formatting and how crucial they are in our development workflows. And yet, even with CLI’s and boilerplates it can still be pretty frustrating to get it all set up properly.
In this post we’re going to focus on VueJS 2.x, VS Code, and how to get ESLint and Prettier all working together like, like… a bunch of stuff working together really really well… 💪 or at least something analogous to a symbiotic relationship anyway.
The goal is to have linting errors show up in your editor as live feedback, and be able to fix formatting errors automatically on save, while not having the two conflict with each other!
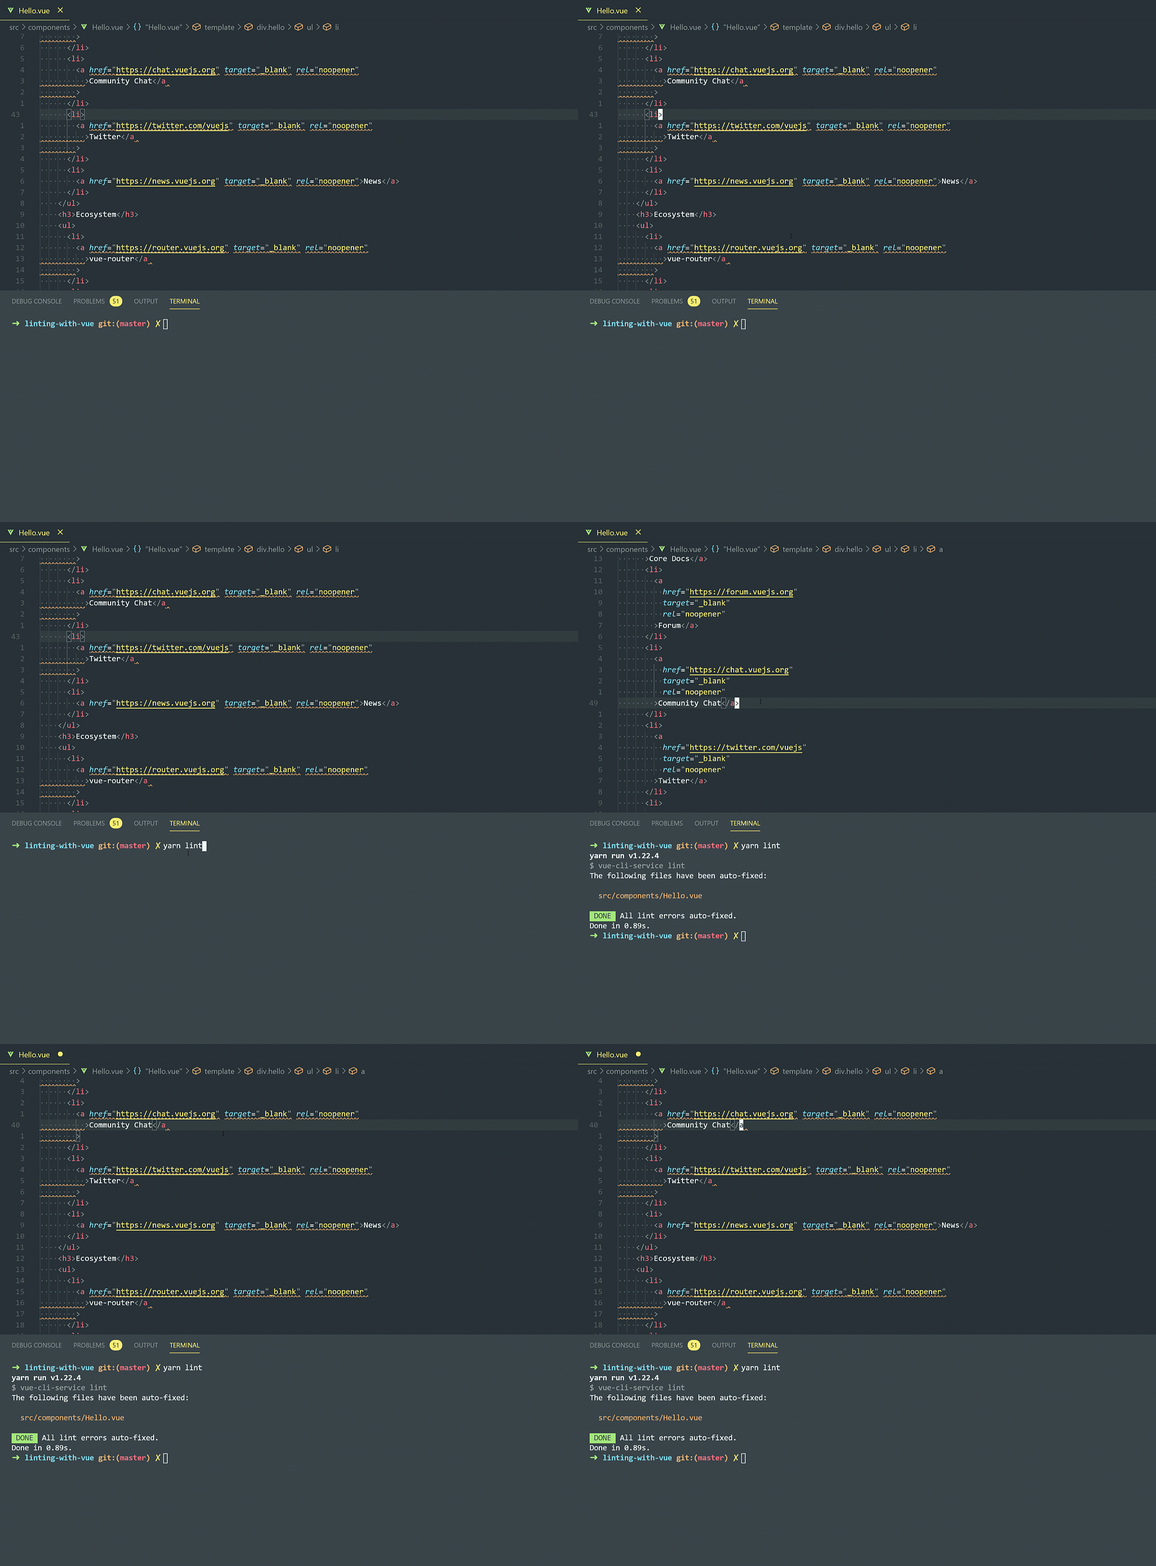
I want to avoid the nonsense shown in the GIF below:

There’s also a video version of this tutorial if that’s how you prefer to learn: https://youtu.be/7qfMmCN4Uwk
🥊 Linting VS Formatting
First, it’s important we understand the difference between linting and formatting.
Linters are primarily concerned with code quality. Having a rule setup that disallows empty functions is an example of a check for code quality.
Linting rules are designed to catch common gotchas or code smells 🦨 and are intended to help developers prevent them from happening in their code bases 🏰.
Formatters on the other hand, are concerned with code style. Like whether you should include a semi-colon at the end of a statement (the answer is NO obviously 🙄), or if indentations should be 2 spaces or 4.
Linters usually have some overlap with formatters. ESLint, for example, has plenty of rules that are just code style related. This line drawn between code style and code quality can also be blurry since arguably having consistent style is a part of having good code quality.
None-the-less it’s important to categorize the two as separate concerns, since the tools we’re going to be configuring need to play together nicely. This means we need to set them both up to handle what they’re strongest at.
🔧 Initial Set Up
For this tutorial we’re going to use the Vue CLI to scaffold our VueJS project. This will get us 90% of the way to having everything we need so it makes sense to just do this.
If you’d like to see a more in-depth tutorial explaining how to set this all up from scratch, let me know in the comments below!
Just incase at the time of reading there are newer versions of the CLI scaffold your project like this:
npx @vue/cli@4.4.6 create linting-with-vueThat will just make sure we’re working with the same versions of everything and you won’t have to worry about conflicting with your global install if you have one already.
cd into the new project and open it up inside Code. Now take a look at your package.json file.
You’ll notice under scripts there’s already a lint command set up for us!
In addition to that you should see a eslintConfig section that sets up everything needed to run ESLint with a VueJS app. We’ll get back to the options later.
For now, I want you to open your HelloWorld.vue file. On the very first line, add a key attribute and set the value to anything you want. For example:
<template key="lotus">
  <div class="hello">
   <!-- more code below -->
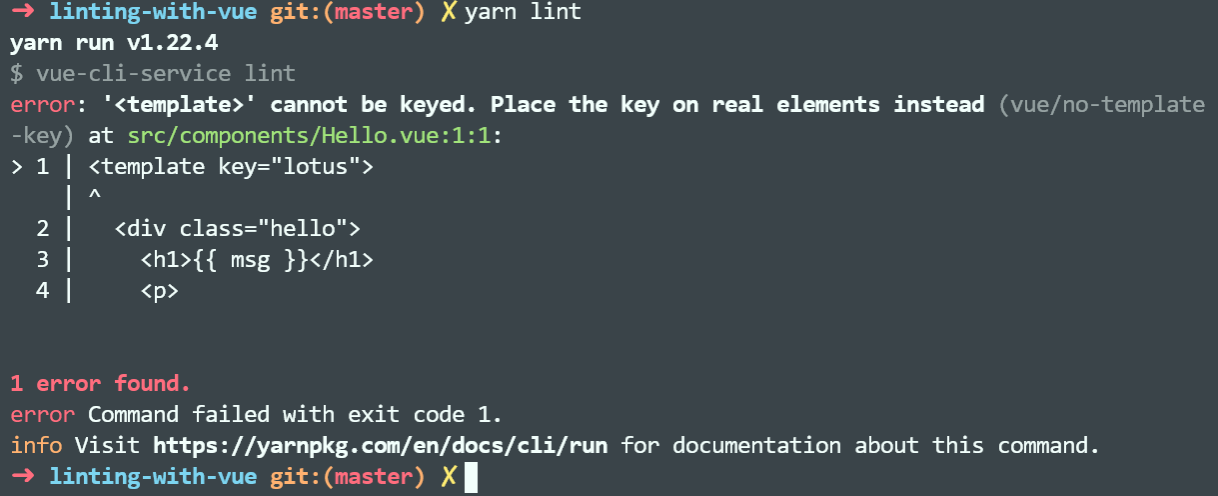
If you run the command npm run lint or yarn lint you should see an error with the text: error: '<template>' cannot be keyed. Place the key on real elements instead (vue/no-template-key) at src/components/Hello.vue:1:1:
This happens because one of the default rules configured from the CLI is no-template-key, an example of a code quality rule. If you remove the key and run yarn lint again you’ll see a clean run!
This is set inside the package.json file under eslintConfig. You should see a section called extends and the first item in the array will be plugin:vue/essential. That’s where the no-template-key rule is coming from. You can see a full list of rules and extend options here: https://github.com/vuejs/eslint-plugin-vue/tree/master/docs/rules
The essential extension is the loosest of them all. If you change it to plugin:vue/recommended you’ll get close to 80% of the rules available.
Now this is really cool! We can catch common mistakes and errors in our code by running a single command and fix them before they go into production - hoozah! ☄🧙♂️
Not bad… but it would be way cooler to see the feedback directly inside our IDE without having to worry about running that command in our terminal. The command will still be super useful for Continuous Integration but we’re humans, not machines!
Get Linting Errors To Show In VS Code
Chances are, if you’re using VueJS you probably already have this plugin installed, but just incase, go install Vetur now! It’s the one with 5M+ installs…
Open your VS Code settings with ctr + , or cmd + ,.
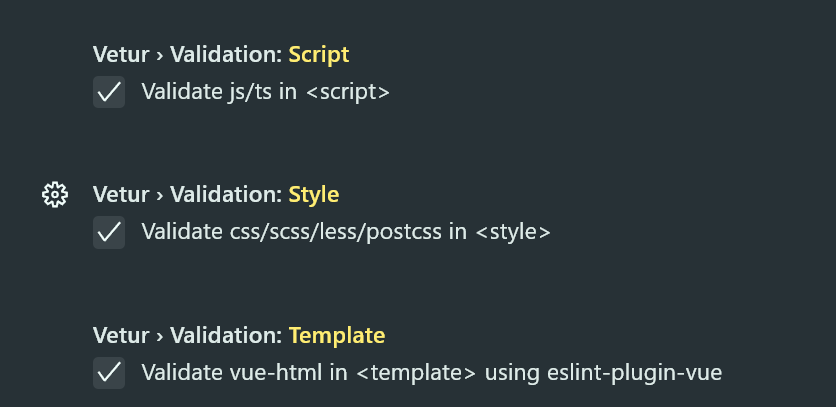
Now search for “vetur” and scroll all the way down to the bottom and make sure you check all the “validation” options like this:
Next you’ll want to install the ESLint plugin by Dirk Baeumer. (Yeah I read that “Boromir” in my head to 😉). The default settings will be fine.
Now go ahead and add that key attribute back to your template tag in HelloWorld.vue
Hopefully at this point you’re seeing a ton of red lines! If not, let me know in the comments and I’ll try to help you out.
Please excuse the fact that I renamed
HelloWorld.vuetoHello.vue— thanks!
If you hover over any of the red lines you should see the text: '<template>' cannot be keyed. Place the key on real elements instead.eslint(vue/no-template-key) just like we saw in the command line before!
👩💻 Format The Code
Now Vetur, among many other features, has formatting built-in. This is important in a VueJS application since usually we’re mixing HTML that uses Vue’s templating engine, JavaScript and sometimes CSS too depending on how loony you are 😜.
Vetur handles figuring out how to format these complicated files known as Vue SFC’s. (Single File Components). Problem is, it still needs to be configured with a formatter to do the actual formatting bit. For this guide we’re going to use Prettier, a code formatter.
Go ahead and install the Prettier - Code formatter plugin.
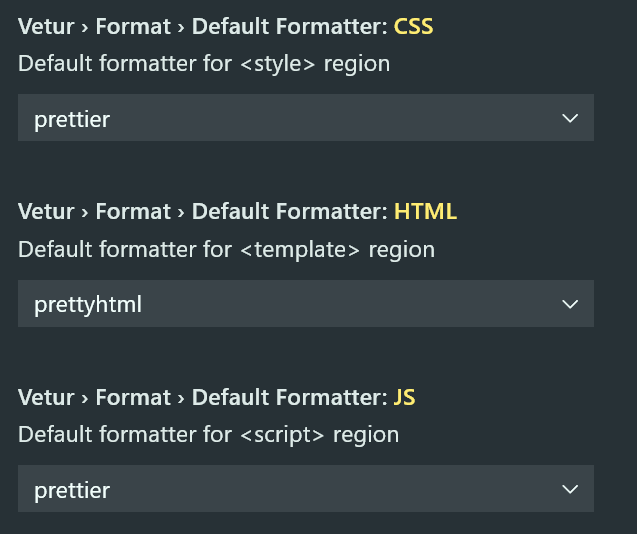
Now if you go back to your Vetur settings you’ll see there are a ton of settings for formatting. Make sure that your HTML, CSS, and JS are all set to use Prettier like this:
Now inside your HelloWorld.vue you can open your command pallet with ctrl + shift + p or cmd + shift + p and type ”format”. You should see an option ”Format Document With…”. Choose that one!
Perhaps counterintuitively, you need to format with Vetur not Prettier. Remember, Vetur is handling the formatting it’s just using Prettier as the driver underneath.
You can set Vetur as the default by selecting ”Configure Default Formatter” after ”Format Document With…” then select ”Vetur” from the options.
Last detail is to make sure your VS Code setting ”Editor: Format On Save” is turned on.
And now we’re almost there!!
Unless you changed the default ESLint settings earlier, you should be able to format your code on save and NOT see any conflicts between your lint rules and the formatted code like observed in the GIF at the beginning of this post.
Problems will arise however. Like ghouls in the night they will come for you and they’ll want your skull 💀. Quick, lets put out some bait and watch them come!
Just for fun change the line in your package.json file where you have plugin:vue/essential to plugin:vue/recommended instead.
Now open your HelloWorld.js file again and observe all those red squiggly lines! Ahhh 😱!
Easy fix though. Just run yarn lint in your terminal and watch them be eradicated! Feels good seeing all those errors get cleaned up by themselves don’t it?
Wait… but now if we save the file… Ugghhh 😭 why???
Now we’re just caught in a loop… Ghouls come, so we kill them (naturally). But killing the ghouls spawns more ghouls! And by ghouls I mean squiggly red lines here guys.
🏠 Bringing It Home
Ok now it’s time to make everyone play nice. Remember earlier when I explained Linters have some overlap with Formatters? And how Linters really should only be focused with code quality and not code style? Well this is where it all comes together my friends.
The folks over at Prettier are aware of this little problem we have right now and offer an easy fix. It’s called eslint-config-prettier.
Yes. Install it.
yarn add -D eslint-config-prettierAnd now add this to the bottom of the extends section in your package.json.
"prettier",
"prettier/vue"
The extends section should look like this:
// ...
    "extends": [
      "plugin:vue/recommended",
      "eslint:recommended",
      "prettier",
      "prettier/vue"
    ],
// ...
What this package and settings will do is remove any rules from your ESLint configuration that conflict with Prettier. This is perfect as we really don’t want to use ESLint for code style — it’s not what it’s good at! Instead we can let Prettier handle what it does best — format code 🙂.
Now you’ll see everything plays together perfectly 🎉!
Next Steps
From here you can configure Prettier however you wish by consulting the docs. But the easiest way to get started is by adding a prettier key to your package.json just like how VueCLI did with eslintConfig. From there you can set any pre-configurations or custom rules you want and you won’t have to worry about them conflicting with your linting rules 🤙


